Saturday, April 19, 2014

Oatmeal Cream Pies

Every time I pass the Little Debbie Oatmeal Cream Pies in the grocery store I get a strong urge to buy at least 10 boxes of these things. I don't, but I really want to. :) So, I have been resisting that urge by completely avoiding that isle, it has been working out...sort of.

I decided to try to make my own, no crazy chemicals or preservatives (except for in the marshmallow cream). I can't take credit for this amazing recipe, head on over to Bravetart to see the original recipe and the recipe to make homemade marshmallow cream. Head on over there just to give thanks for posting such a great recipe!

This recipe does require the use of a kitchen scale.

Oatmeal Cream Pies
yield 30 sandwiches (60 individual cookies) with a 1" cookie scoop

Cookies:

8 oz.    A.P. Flour
4 oz.    Old-Fashioned Oats
1/2 oz.    Cocoa Powder
2 oz.    Dried Apple Rings
3 oz.    Butter, Room Temp
2 1/4 oz.    Oil (I used vegetable)
7 oz.    Sugar
1 1/2 oz.    Molasses
3 oz.    Corn Syrup
1 1/2 tsp.    Baking Soda
1/2 tsp.    Baking Powder
1/2 tsp.    Salt (Omit if using salted butter)
1/4 tsp.    Ground Ginger
1/4 tsp.    Cinnamon
1/4 tsp.    Mace Powder
1    Egg
2 oz.    Milk

Filling:

2 cups    Marshmallow Cream
4 oz.    Butter, Room Temp
Pinch    Salt (omit if using salted butter)
1/2 tsp.    Milk


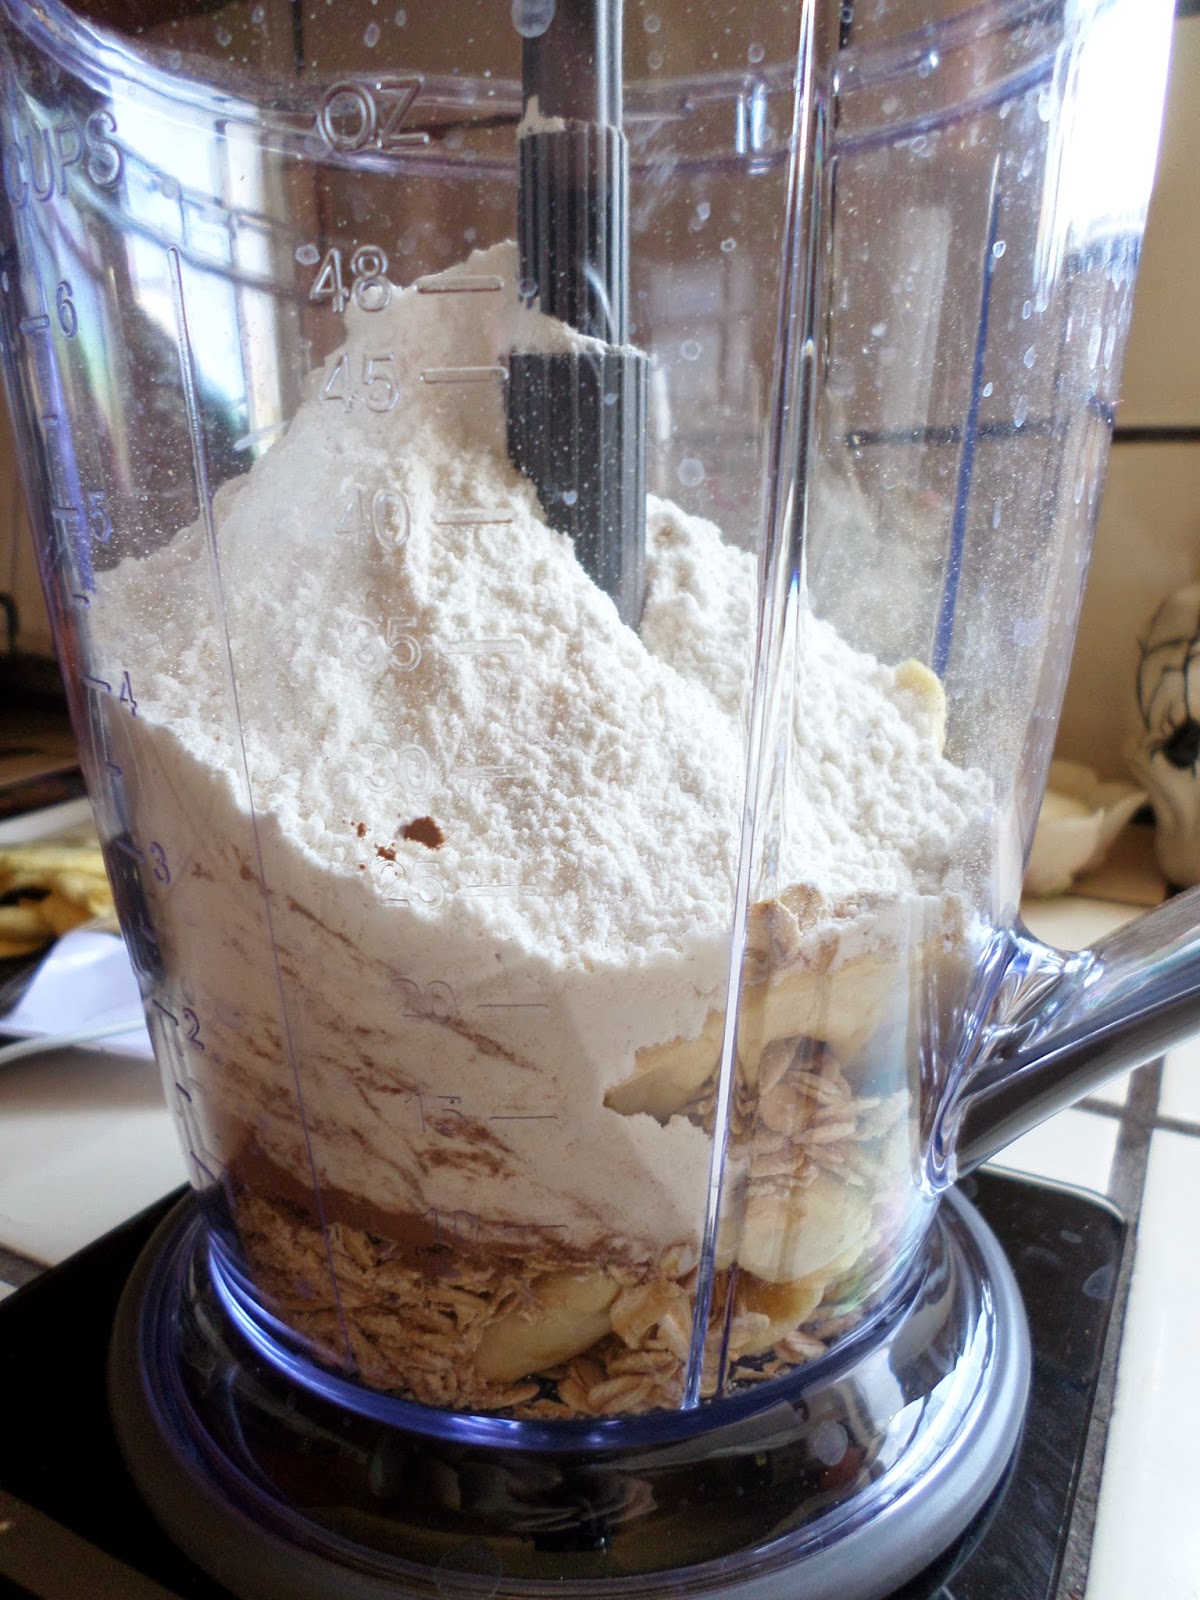
Place dried apples, oats, cocoa powder, and flour in a food processor. Blend until no large chunks remain. About 2-4 mins.


This is what it will look like, set aside.


In a medium bowl, place butter, oil, sugar, molasses, corn syrup, baking powder, baking soda, salt (if used), cinnamon, mace, and ginger. Mix until combined.


Mix in the egg until combined.


Place the dry ingredients and the milk in the bowl.


Fold in with spatula until combined.


I used a 1" cookie scoop, place 12 cookies on a sheet pan.


Bake at 350F for 10 min. Rotate halfway through.

let cool enough so you can place them on a cooling rack without breaking.


For the filling, place marshmallow cream, and butter (I used margarine). Mix until smooth.

*Note: Marshmallow cream is very, very sticky, be prepared to have it all over your fingers*


Add in powder sugar and salt, mix until light and fluffy.


Place cream into a pastry bag (I used an 807 tip).


Pipe a dollop into the center of half of the cookies, place top cookies onto the dollop and press so the cream reaches the edges of the cookies.


yum, yum!


Enjoy!

Wednesday, April 16, 2014

Banana Cookies

Have you ever bought bananas thinking "oh yeah! Those are going to be delicious in my tummy." Then a few days pass, and they are slowly dying. Yep, that has happened to me! Today, in fact, I had some aging bananas giving me the stink eye for leaving them to sit. So, I decided to make something out of them, give them new life so to speak. Haha.

I didn't want to do yet another banana bread, so I went on the lookout for an alternate recipe to use my brown bananas. Well, guess what I found? *Drumroll please* a banana cookie recipe! I was very excited, I have never made banana cookies before...could it even be done? What is this sorcery?

So I set out to make them and oh my goodness! These little bite size cookies are delish! They are moist, banana-y, and very easy to make.

I found the recipe on Pots Pans & Parkers, there is even a delicious looking frosting that goes on top. I didn't want these to be too sweet so I omitted the frosting, but, head on over there if you want to try it out.

Banana Cookies
yield 45 cookies (1" cookie scoop)

3/4 cup    Shortening or Butter
3/4 cup    Sugar
1    Egg
1/2 tsp.    Vanilla
2    Mashed Bananas
1/4 tsp.    Baking Soda
2 cup    Flour


Place shortening (or butter) and sugar into a bowl.


Mix until creamy and combined.


Add the egg, bananas (as you can see I did not mash mine, they were pretty soft), and the vanilla.


Mix together, doesn't that look yummy? :P


Add in the flour and baking soda in a few additions. Mix until combined.


Using a 1" cookie scoop, I put 15 on each sheet pan (I sprayed my pans with cooking spray, feel free to use parchment). The cookies don't spread too much.


Bake at 350F for 8-10 mins. Bottoms will be golden brown, like the picture below.


Enjoy!

Tuesday, April 15, 2014

Easy No Rise Pizza

I came across a recipe a little while back for an easy 2 ingredient pizza recipe, yesterday I finally decided to try it out...Unfortunately I didn't have either ingredient! The recipe calls for self-rising flour and greek yogurt, luckily there was a substitution for all purpose flour right on the website.

This recipe will make 2 personal size pizzas or 1 med/large pizza. The sky is the limit with your toppings, create savory or sweet pizzas!

No Rise Pizza Dough
altered slightly from The Slow Roasted Italian

1 1/2 cups    A.P. Flour
1 1/2 tsp.    Baking Powder
3/4 tsp.    Salt
1 cup    Sour Cream


Place flour, baking powder, salt, and sour cream into a bowl.


Mix together (I used a wooden spoon) until combined.


Knead, by hand, on a floured counter for about 7 mins. Add flour as needed to keep dough from sticking.


Split dough in half, and roll out. I put cornmeal on the bottom of the pans, but you don't have to.


Top as desired, here is my pepperoni pizza.


and my cinnamon sugar one (of course).

Bake at 450F for 10-12 min. 
*Note dark pans will take about a min longer than light colored pans*


My pepperoni pizza (in a light pan) took 11 min, I rotated it at 5 min. 
My cinnamon sugar pizza (in a dark pan) took 10 min, I rotated it at 5 min. (I also topped with a powder sugar glaze)


Enjoy!

Saturday, April 12, 2014

Peanut Butter Bars

So, I was perusing pinterest the other night and came across "lunch lady peanut butter bars" . From what i've heard school lunches use to have desserts that came with them! Unfortunately, my schools were not the kind of school that gave out delicious desserts with lunch. :,(

Now, these bars tasted great, and they even tasted better the next day! If you love peanut butter then you'll love these. I altered the recipe a bit, the original recipe was very sweet, with two types of sugar, and peanut butter in the bars, then another layer of peanut butter, then (finally) the chocolate frosting on top! Whew...they were way to sweet for me, but head on over to the original link if you like it that way.

Peanut Butter Bars
Yield 1 cookie sheet

Bars
1 1/2 cup    Flour
1 1/4 tsp.    Salt (omit if using salted butter)
1/2 tsp.    Baking soda
3/4 cup    Butter
1/4 cup + 2 Tbsp.   Sugar
1/4  cup + 2 Tbsp.    Brown Sugar
1 1/2 tsp.    Vanilla
3/4 cup    Peanut Butter (original recipe used creamy, I used crunchy)
2    Eggs
1 1/2 cup    quick oats

Topping
3/4 cup    Peanut Butter

Frosting
1/2 cup    Butter
3 1/2 cup    Powdered Sugar
2 Tbsp.    Cocoa Powder
1/4 cup    Milk (I used almond milk, you can use whatever milk you have)
1 tsp.    Vanilla

Let's get started!


Place peanut butter, sugar, brown sugar, eggs, vanilla, and butter into a bowl and mix until smooth.

*Note: as you can see above I did not use butter in this section, I used mashed banana as a substitution. If you would like to use this substitution just be aware that the bars will come out chewier. The substitution is 1:1, so use 3/4 cup mashed banana for 3/4 cup butter*


(if you used crunchy peanut it will not be smooth)

Not shown: Mix together flour, salt, and baking soda in a separate bowl.


Add dry ingredients in 3 additions, mix only until incorporated.


Fold in oats.


Spread onto a greased cookie sheet.

Bake at 350F 12-15 min (or until golden). Rotate halfway through. 
Mine took about 16 min because of the mashed banana.


Golden and delicious! Now onto the PB Spread.


All you do is place peanut butter into a small bowl and whip it until lighter in color.


When the bars have cooled for at least 10 mins. Spread the peanut butter on the top of the bars.

Next, we have the frosting!


In a sauce pan, melt the butter.


Add in the milk, and the cocoa powder.


Mix until combined, cook over medium heat until boiling, stir constantly. 


Remove from heat, mix in vanilla. Then add in the powdered sugar in about 4-5 additions, make sure you use a whisk, otherwise you will get lumps like in my picture lol. :) Stir until thickened.


Spread immediately onto the peanut butter layer.

Cool completely before cutting into them.


Enjoy!


Wednesday, April 9, 2014

Sweet Buttermilk Cornbread

Let me start this post by saying that I never liked cornbread when I was younger. Something about the crunchy corn kernels inside just didn't do it for me. Lately I have been trying "new" things that I hated when I was a child.

This is where cornbread comes in...Now, when I found this recipe on allrecipes, I was quite surprised. It had 3,661 reviews and it was still given a 5 star! I immediately decided to try it out. This recipe is ah-mazing! It is sweet and moist, not at all dry with crunchy bits of corn in it! I was converted, I am happy to say that I am a cornbread eater now. :)

I did want to note, this is a sweet cornbread, if you are looking for a more authentic southern style cornbread you will probably be disappointed.

Sweet Buttermilk Cornbread
Yield (1) 8 or 9" square pan

1/2 cup    Butter
2/3 cup    Sugar
2    Eggs
1 cup    Buttermilk
1/2 tsp    Baking Soda
1 cup    Cornmeal
1 cup    A.P. Flour
1/2 tsp    Salt


Grease (and flour if you'd like) square pan


Melt butter in a pot.


Remove from heat and add sugar, stir to combine.


Add eggs, mix well.

(not shown: mix together buttermilk and baking soda)


Pour buttermilk mixture into pot, stir to combine.


Add cornmeal, flour, and salt, mix until only a few lumps are left.


Pour into prepared pan. 

Bake at 375F for about 30 mins


It will be a nice golden color on the outside, and a toothpick will come out clean when tested.


Enjoy!